W6SI Blog Page (Entry 2)
9/30/14 (rev. 10/16/14)
How to Improve Transmit Audio of Yaesu FT7900 Transceiver
Have anyone told you that your transmission audio is low, even though the signal is full-quieting?
Maybe there is a reason for it...
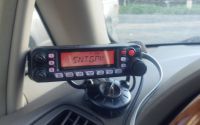
Recently my 10+ year old mobile dual-bander started to crumble, so I looked around for a replacement. Basically, I don’t do too many advanced things while driving, so I opted for a basic machine. No need for dual receive. No cross band repeat. No digital mode. But I do need a detachable control head. And it should come in budget. I ultimately chose Yaesu FT7900R, as it satisfies the minimum requirement, came with the front panel separation kit, and was on manufacturer’s rebate sale.
A perfect fit, right? Well... I had a problem. My transmission audio was said to be too low. How could that be? Come to think of it, a few SOARA folks do have that same problem. Let's explore...
I normally use my old faithful Heil Sound Traveler headset for mobil operation. The reaction from the normal on-air buddies were less than favorable. My transmit audio was faint, and intermittent. Wow, really? Then I use the stock microphone. It's still low. Wait, it’s a brand new rig! How can it be broken? After a little soul searching, I came to a pair of conclusions.
- The microphone input of the transceiver is not quite compatible with the Heil headset.
- The Yaesu microphone has a built-in audio restrictor.
First, the Traveler headset comes with a dynamic element of 600 ohm output. It puts out -57dB to that load. According to Yaesu spec, FT-7900 has 2Kohm input for the microphone. The stock MH48 microphone has electret element and has -40dB output into 2Kohm. A simple estimate that 600ohm microphone might have 1/3 of output feeding into 2Kohm, that’s over 20dB difference from the stock microphone. No wonder my audio level was low. All these time, I have taken for granted the most, if not all mobil gears come with 600 ohm input. What a shocker.
As it turned out, there isn’t much in line of head set for amateur radio that has 2Kohm mic element. Not Heil, not most anyone else (that’s worthy). You can get a gamer’s headset for PC, which generally come with an electret element. They are either extremely expensive, or extremely cheap. I have one such head set (in cheap category) to use for on-line meetings, but unlike my Traveler, it is pretty uncomfortable wearing to say the least. I am right now trying to solve this problem one way or another. Either replacing a microphone element, or add a preamplifier in my mobil system. More on this at a later entry.
Now, so if I am using the stock microphone that came with the transceiver, how come my audio is still weak? Then I remembered that I heard from way back US market, because compared to Japanese language, US English is spoken rather loud, which resulted in too much audio level for their early models of VHF/UHF rigs. HF rigs level can be adjusted since they typically have mic gain on the front panel, but most VHF/UHF gears do not. Not wanting another “factory adjustment”, they “plugged” the inlet path to the microphone to lower the net gain. I recall, back in late 90’s I actually drilled a hole in my mic / speaker unit for my HT to overcome a similar problem. So I searched on the net to find there are several people with the same problems out there. Let's fix that microphone!
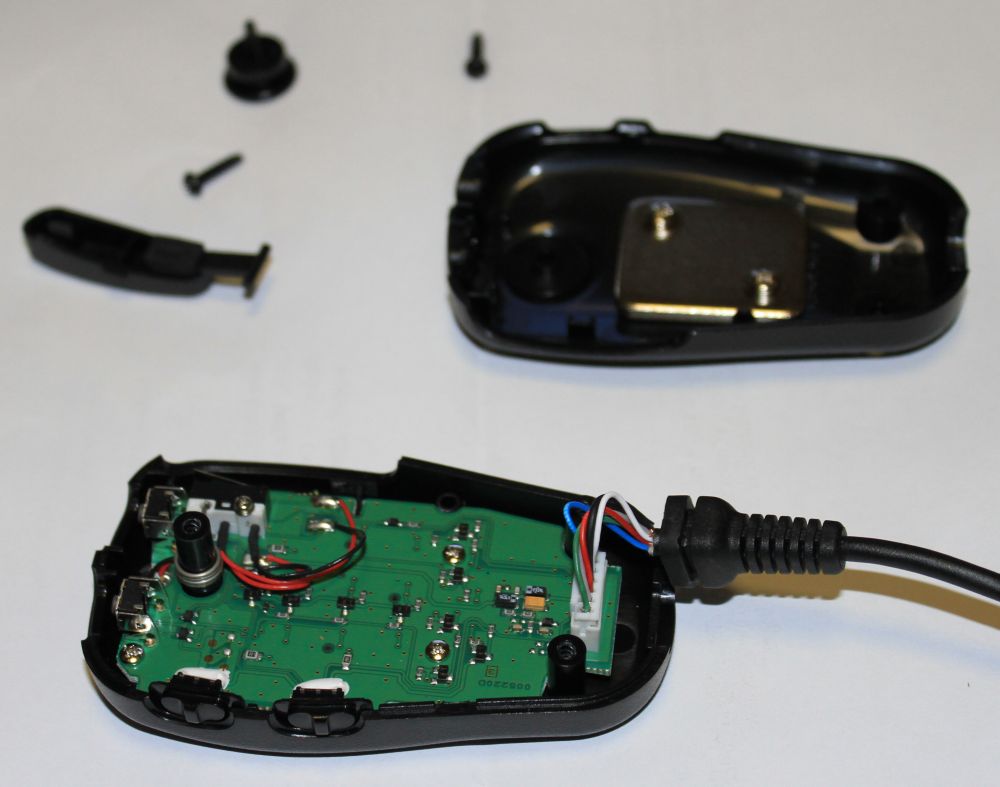
Time to open up the microphone shell to remedy the problem. It’s pretty simple. The procedure requires a small screw drivers (plus and minus), no soldering required.
To fix the MH48 microphone:
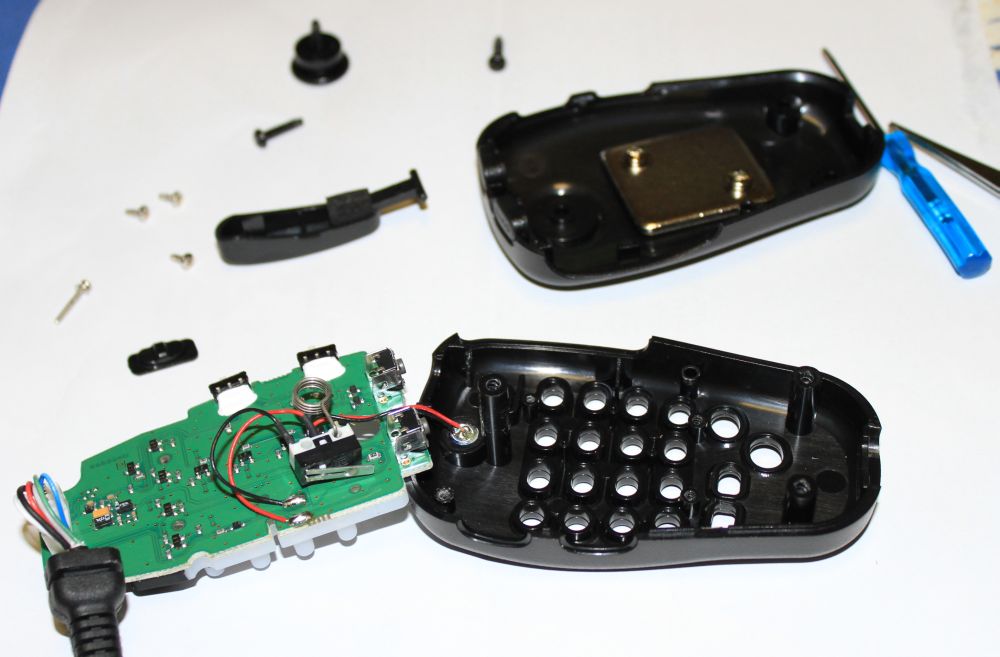
- Lift off the back shell, by removing three screws in the back.
- Lift off PTT lever on the left side. Lift off UP/DOWN buttons from the top, LOCK, LAMP sliders from the right side.
- With the shell front down, green PC board assembly is visible. Remove three screws, one in the upper left, two in lower half.
- Remove a thin screw fastening the PTT micro switch through the board to the shell.
- Gently lift the board away. Care should be taken not to stress the wires to the mic element.
- Gently work a small screw driver around the mic element rubber boot and slowly work it out from the round mic housing.
- Remove the thin plastic sheet (yes, a plastic sheet!) the plugged at the bottom of the mic housing. Now you can see through two hole openings.
- Use 1.5mm (or 1/16” if you prefer) drill bit to widen the openings.
- Carefully remove the black rubber boot from the mic element, and use Xact knife or something to enlarge the opening a bit more. Then put it back on the mic element.
- Wad up a tiny bit of cotton (use a Q-Tip) and place it inside the mic housing where the plastic baffle was. Use just a tiny bit to serve as a wind screen for the mic.
- Carefully guide the mic element with the rubber boot back into the mic housing mold. Make sure it seated all the way down.
- Mount the circuit board inside the microphone shell, tighten down the screws you removed.
- Place the PTT and buttons carefully, make sure they are oriented right and moves correctly.
- Screw down the bottom shell piece.
That’s it. Basically remove the plastic baffle and enlarge the holes to the mic element. Just doing that improved my signal report markedly. So it solved the problem for the stock hand mic. But I like to use head set while driving, so I still aim to fix the Traveler.
FT7900 is a popular mobil rig, and I don’t think I’m alone having this problem. If you are in a similar situation, try it.
Stay tuned for another episode on replacing the Traveler mic element.
Above is a reflection of my thought and only mine. But if you have any questions, feedback and/or suggestions, please send me an e-mail. I might reply on this page (sorry, no guarantee)